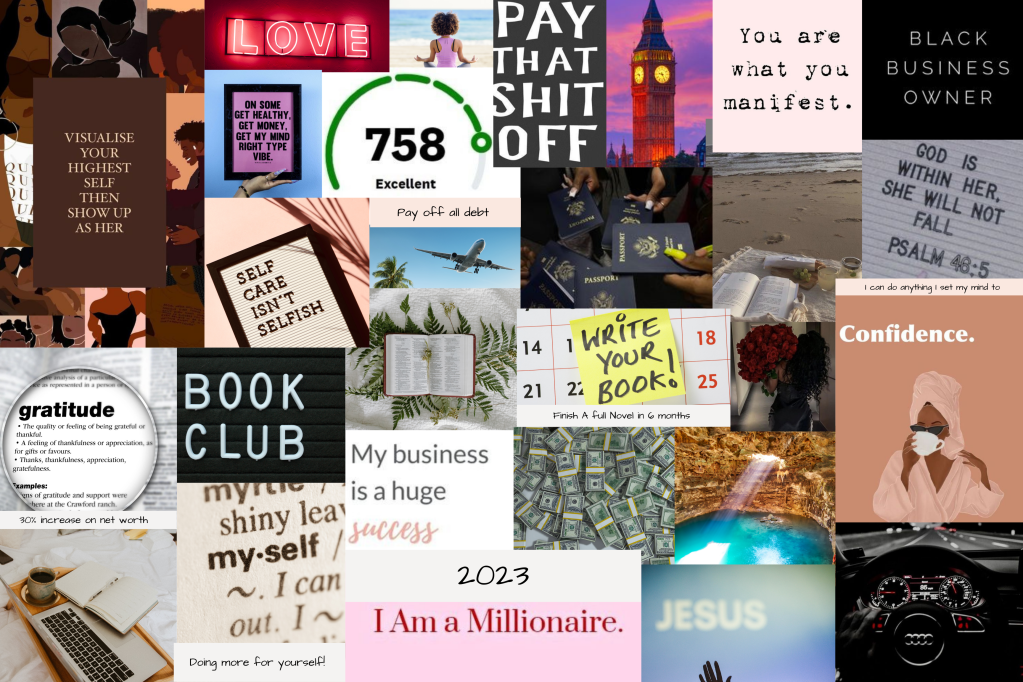
Vision boards have become insanely popular recently, and with good reason. Vision boards help to keep us focused on our goals and serve as a visual reminder of what we want to achieve. They help us to stay motivated and inspired. Just looking at all the things you want in life, can create powerful and healthy habits to get toward those goals. By creating a vision board and looking at it regularly, we can remind ourselves of our dreams and stay positive on our journey to achieving them.
Benefits of vision boards
Vision boards have so many benefits, but here are a few:
- Provides you with clarity on your vision;
- It keeps you focused on your goals;
- Increases your motivation;
- Reinforces your intentions and affirmations;
- It can improve your creativity.
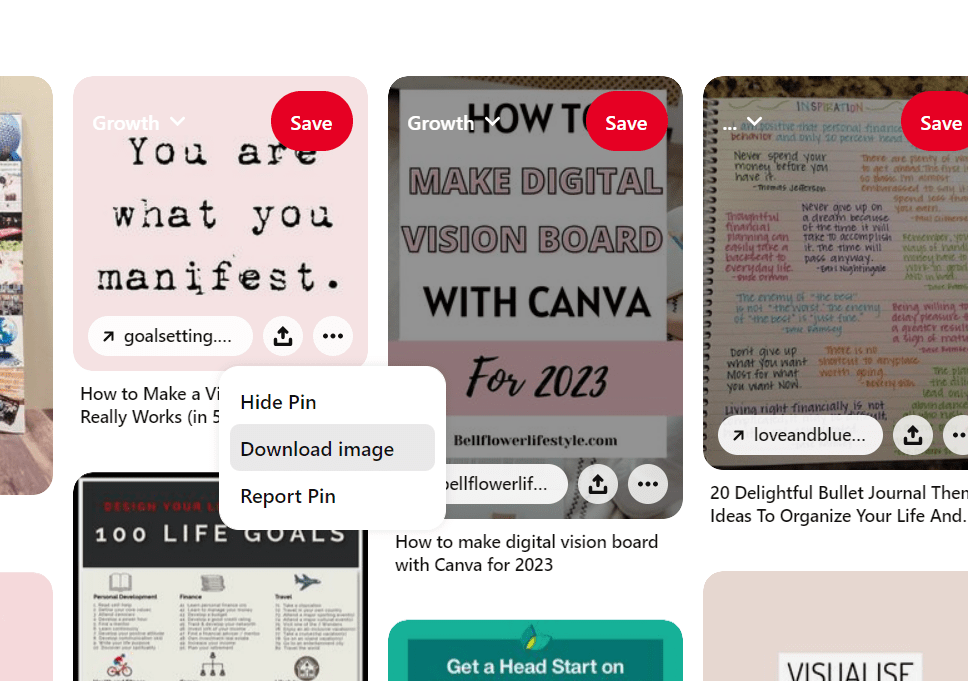
Step 1: Create a new Pinterest board
*You don’t have to do this part, Canva has a photo library however, I find Pinterest to have better and more relevant photos.
Once you created your board, start pinning all the images you want to be included in your vision board.
Look for quotes, photos of things you want, photos of things you want to accomplish. Places you want to go. Don’t hold back.
Step 2: Download your pinned photos
After you’re happy with the photos you’ve pinned, save them to a folder on your device. This will allow you to upload them into Canva.
Step 3: Create a new design

To start your design on Canva, click the purple “Create a design” button on the top right of your screen.
You can choose desktop wallpaper or you can choose a custom size. I chose 24 by 36 in and had my printed and placed in a frame.
Step 4: Pick a layout
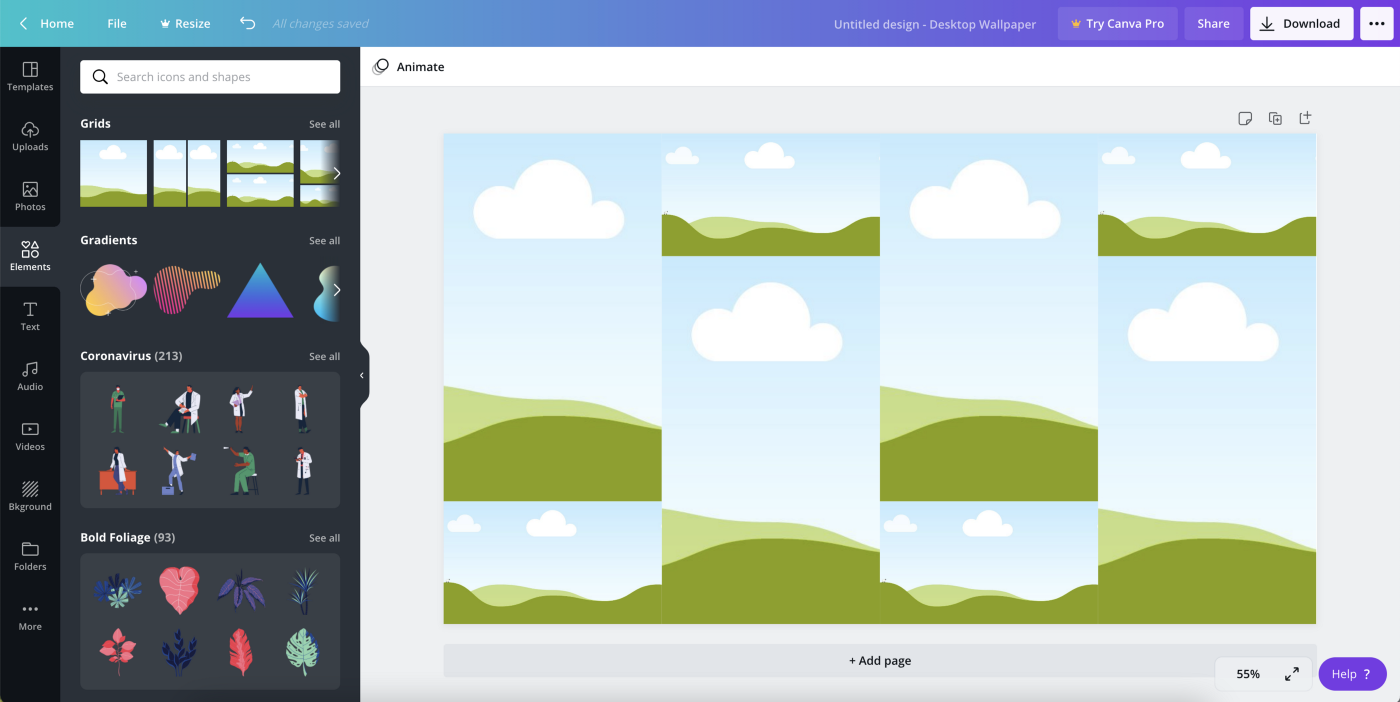
Now it’s time for you to decide the layout of your board.
If you want a free collage layout where you add your images wherever then you can skip this step. If you want a grid collage layout, like the one above, then keep on reading!
The grid above is my favorite for my vision boards. To find the grid options, click on “Elements” on the far left, then scroll down until you find “Grids” and click on “See all”. Then just choose your favorite.
*Tip: count how many pictures you saved and find a grid that matches that number.
Step 5: Upload your photos to Canva
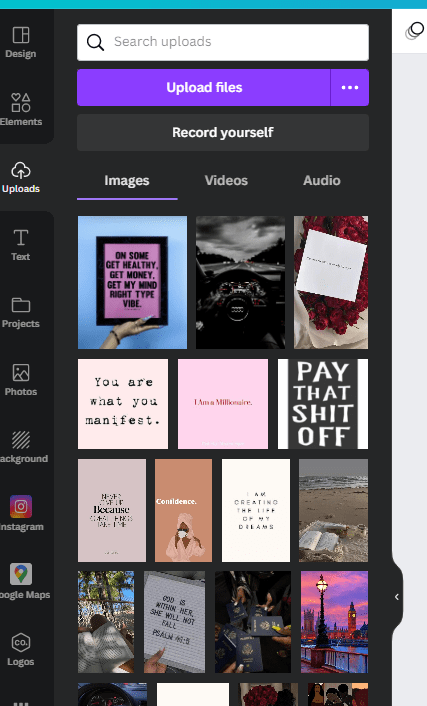
To upload your Pinterest images, click on “Uploads” on the top left then “Upload media”, select the photos you saved, and viola!
*If you didn’t save your photos from Pinterest, you can click on the “Photos” button right under the upload one and use Canva’s built-in photo library.
Step 6: Creating your vision board

Finally, let’s start making your vision a reality!
This is the easiest and most fun part. All you need to do is click and drag your images into the grid spaces (or the blank space if you choose a free layout).
Step 7: Download and place everywhere!

All that’s left for you to do is download your vision board and make it your new wallpaper.
To download your Canva design, click on the “Download” button on the top right, and then “Download” again.
Lastly, just make it your new desktop wallpaper and you are ready to start manifesting your dream life!
Give yourself permission to tweak and revise your vision board as you move through the year. Goals and visions change and sometimes the initial idea, sparks a better vision. Trust yourself, and adjust accordingly to what feels right or has shifted in your life.

Leave a comment